Download Enscape Plugin for Revit:
https://enscape3d.com/download/
JA Floating Enscape License Key:
thEgIdzgfPpyetcBAABdKHCZ2AEBAFQATGljZW5zZWRUbz1OYXRhbGllIFN0YXRlcyNFbWFpbD1pbmZvQGplbnNlbi1hcmNoaXRlY3RzLmNvbSNDb21wYW55PUpFTlNFTiBBcmNoaXRlY3RzCgAAAHKuv5mmpbL5PNKlkS/KW2Dre614ppz+L+8mFcw1FuDkT5eAvhldkqAe6pPxpZt2MGNk8dV6fI1ugl8sCA+K/4LZfDdcnCr6Qq0PNKdwtC5rOr3ugJnjmKxeR9SbmbIUa8mZItS94k1YwrrZ6gv6vSlZGlaTQDjBJChVHdMvunHk
Getting started with video creation in Enscape
Enscape provides a great video walkthrough renderer in Revit, SketchUp, Rhino, Archicad and Vectorworks. The overall process of walkthrough rendering is very simple.
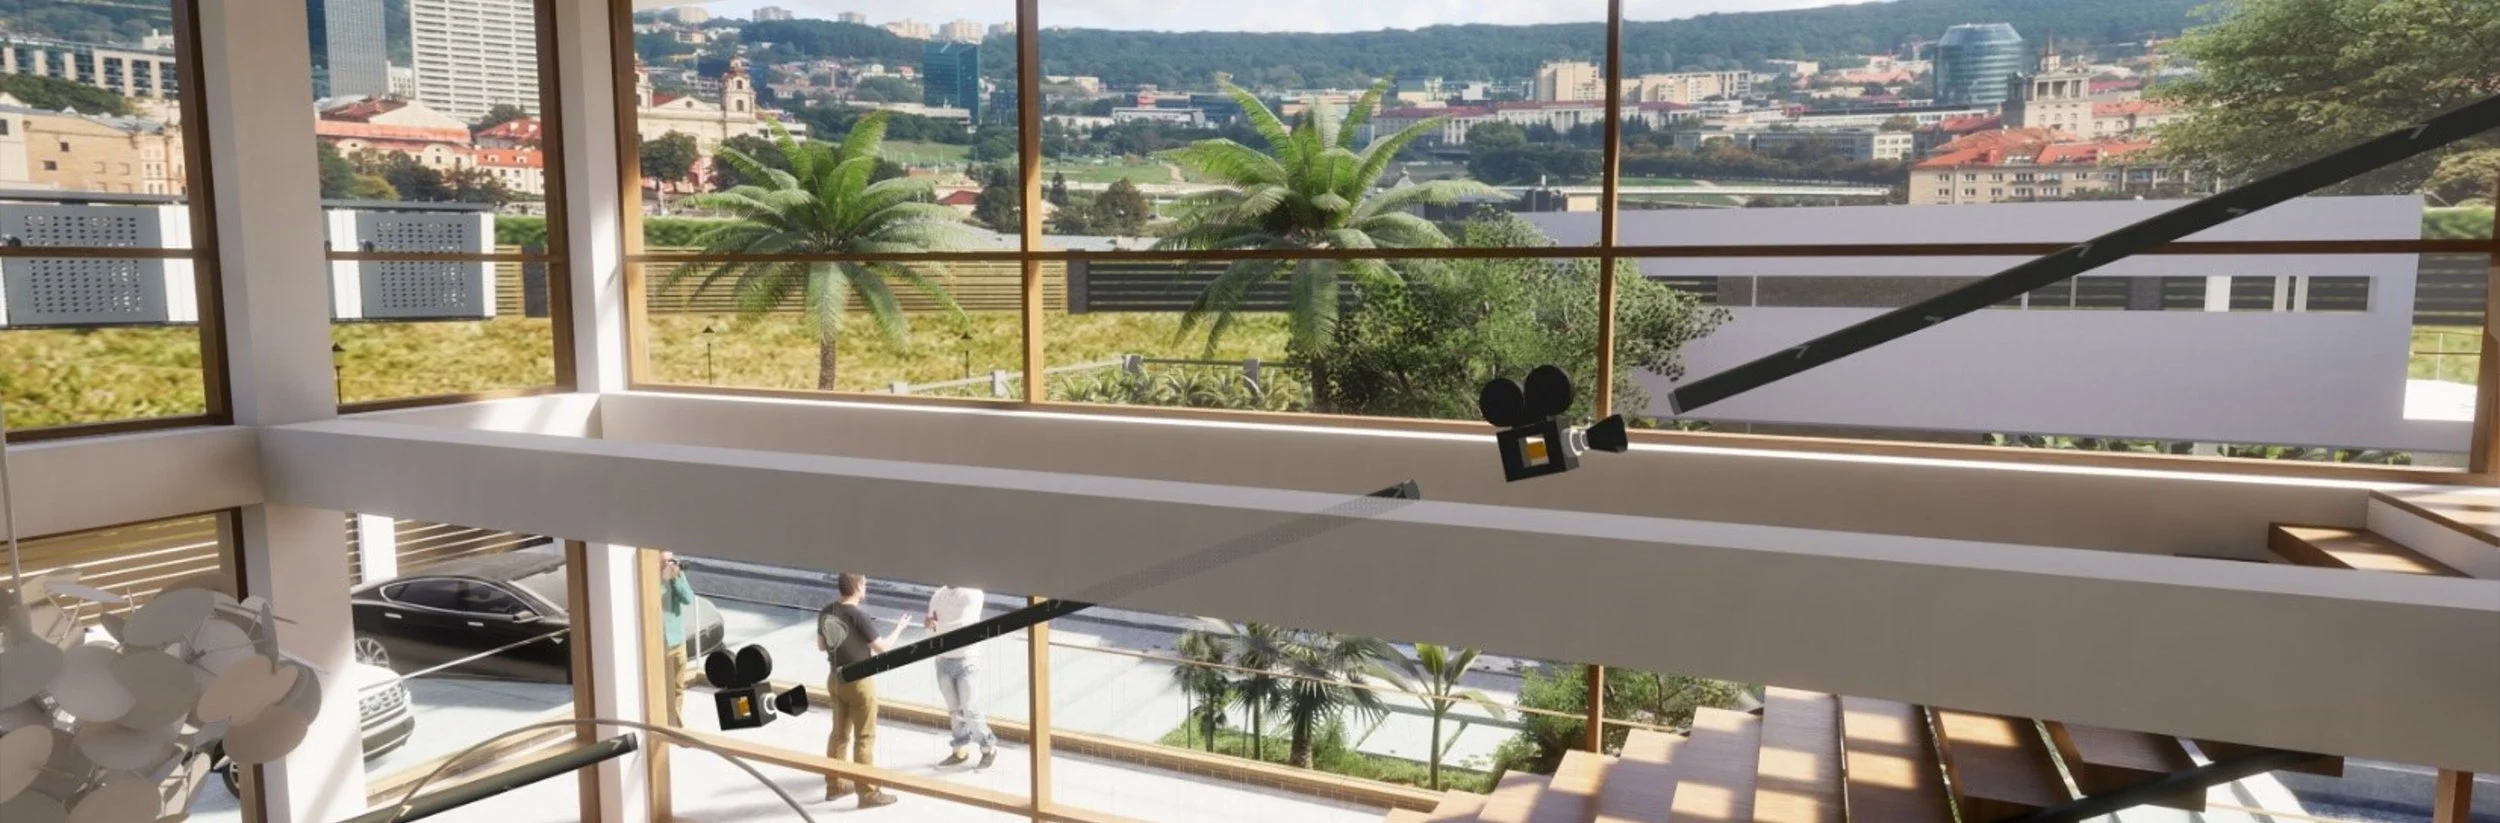
First, in your design software, start Enscape, toggle the Video Editor on, and then compose a view in Enscape (see first image below). Click Add Keyframe (the + button) to define the start point. You can then continue this process along the path you would like the video to follow. The path and keyframes are visible within Enscape, as shown in the second image below. The video follows this path and morphs between each keyframe. For example, notice the view direction arrow added at each keyframe. Enscape will smoothly transition between #1 and #2 and then again between #2 and #3.
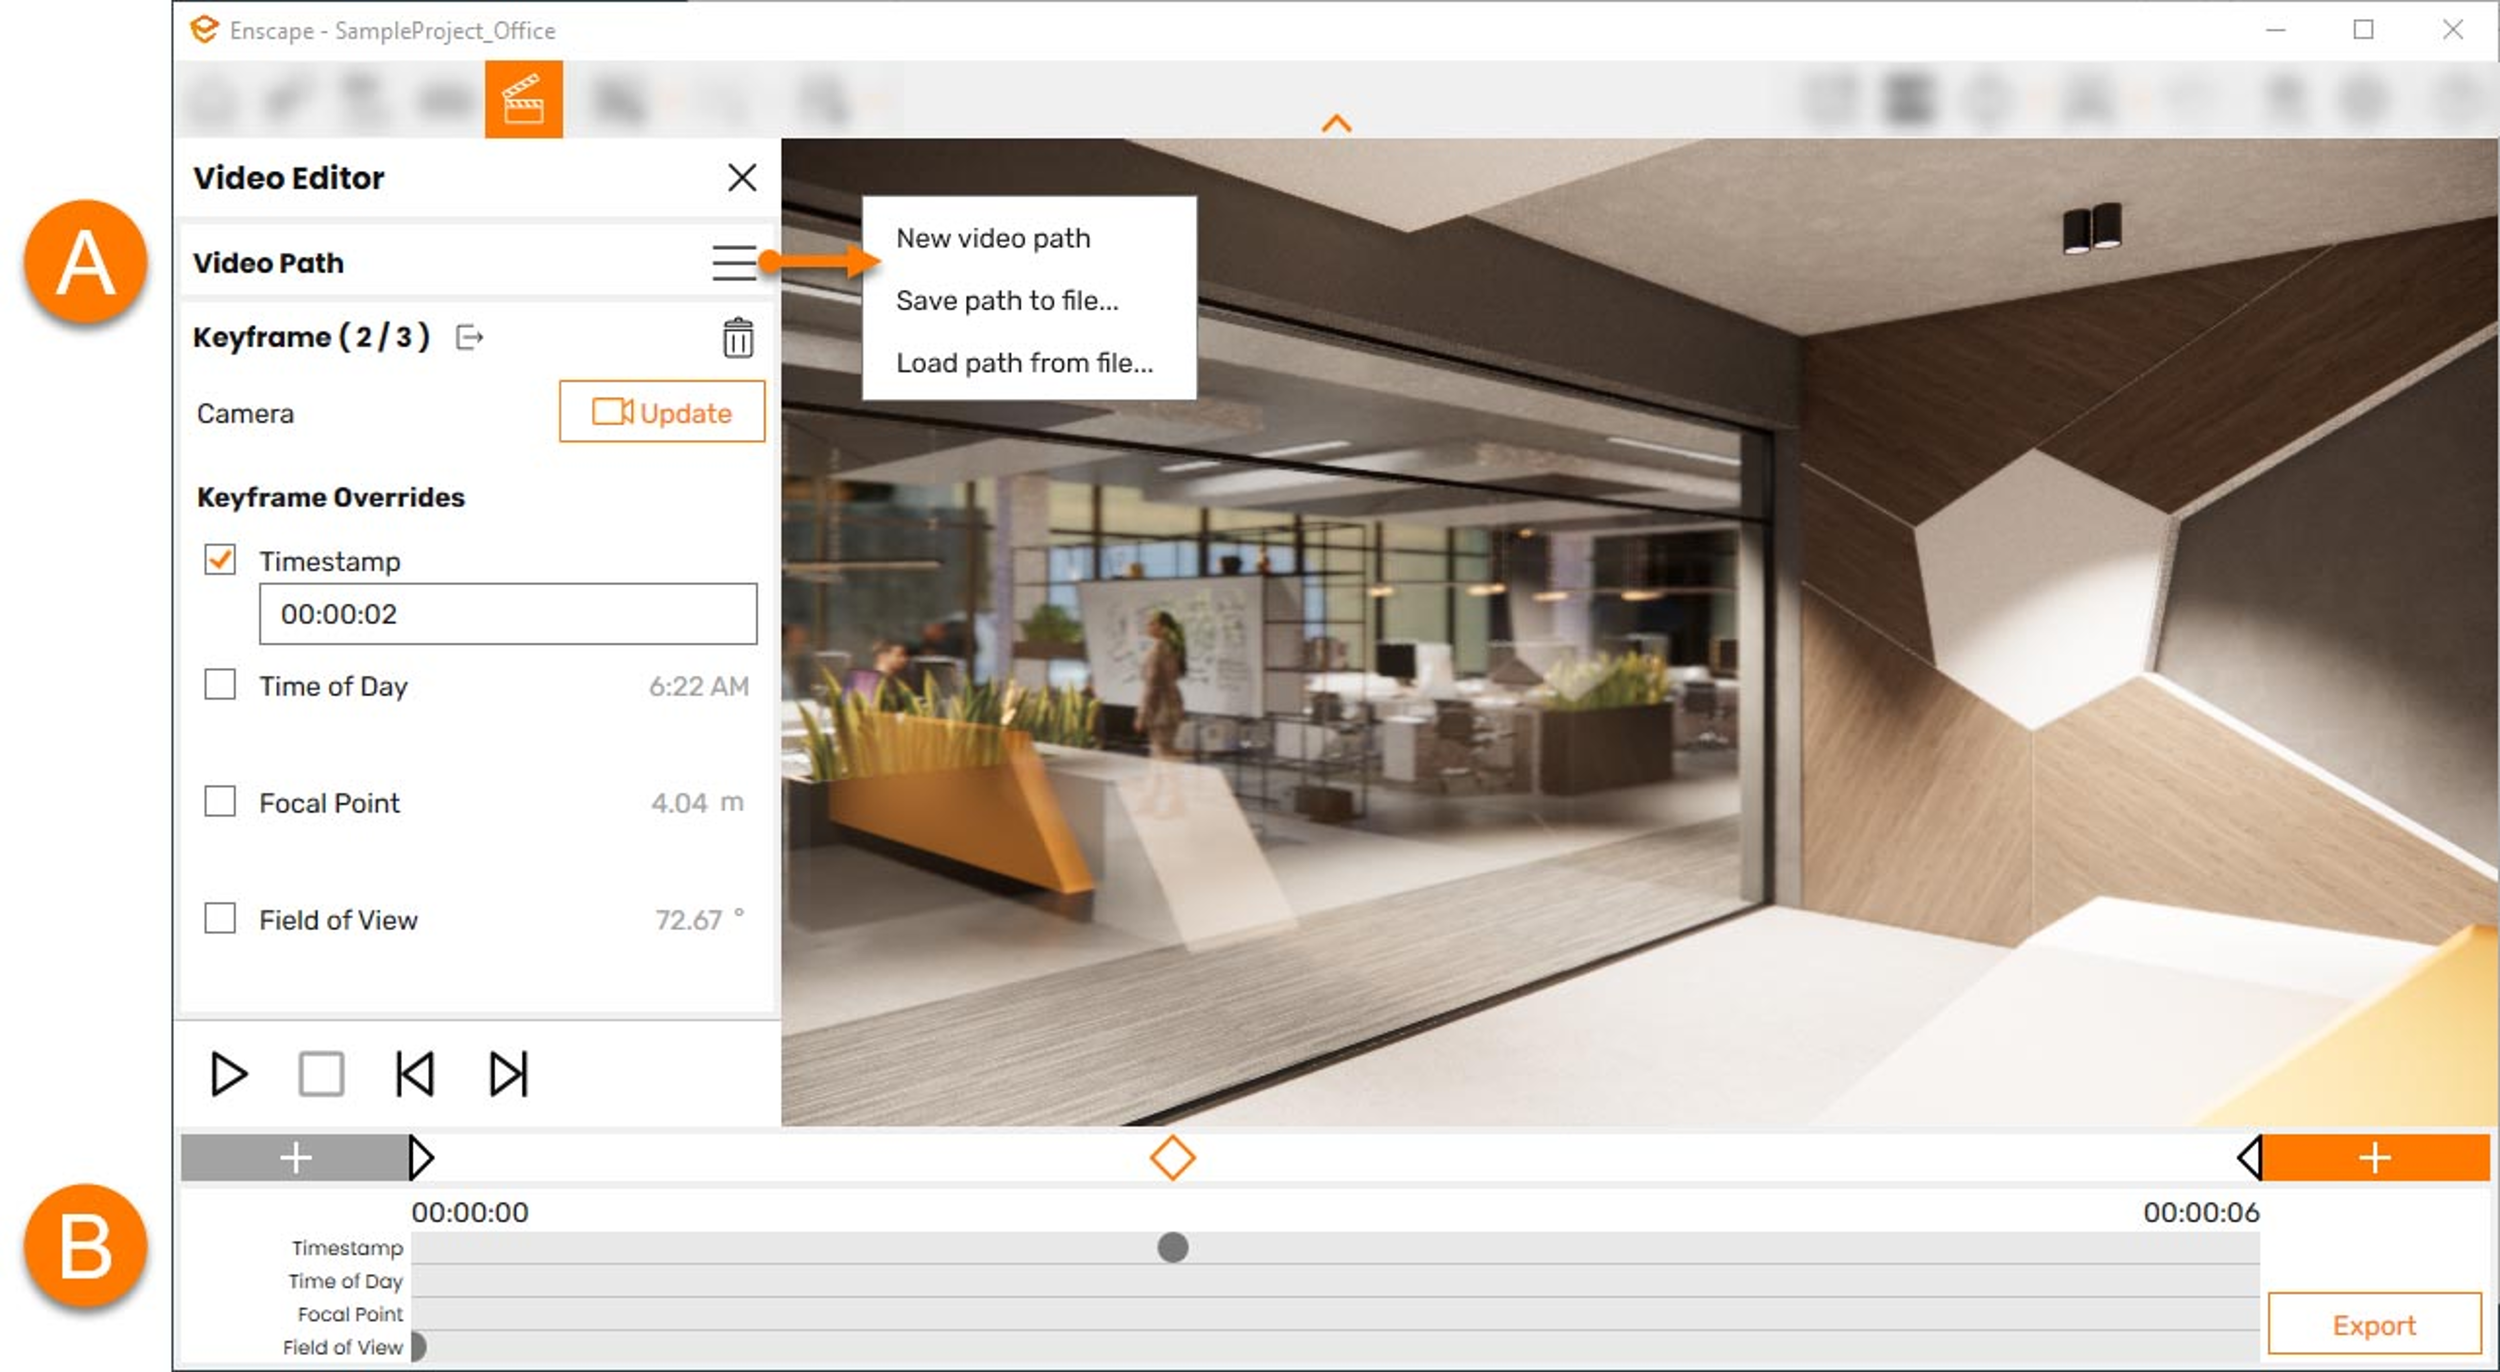
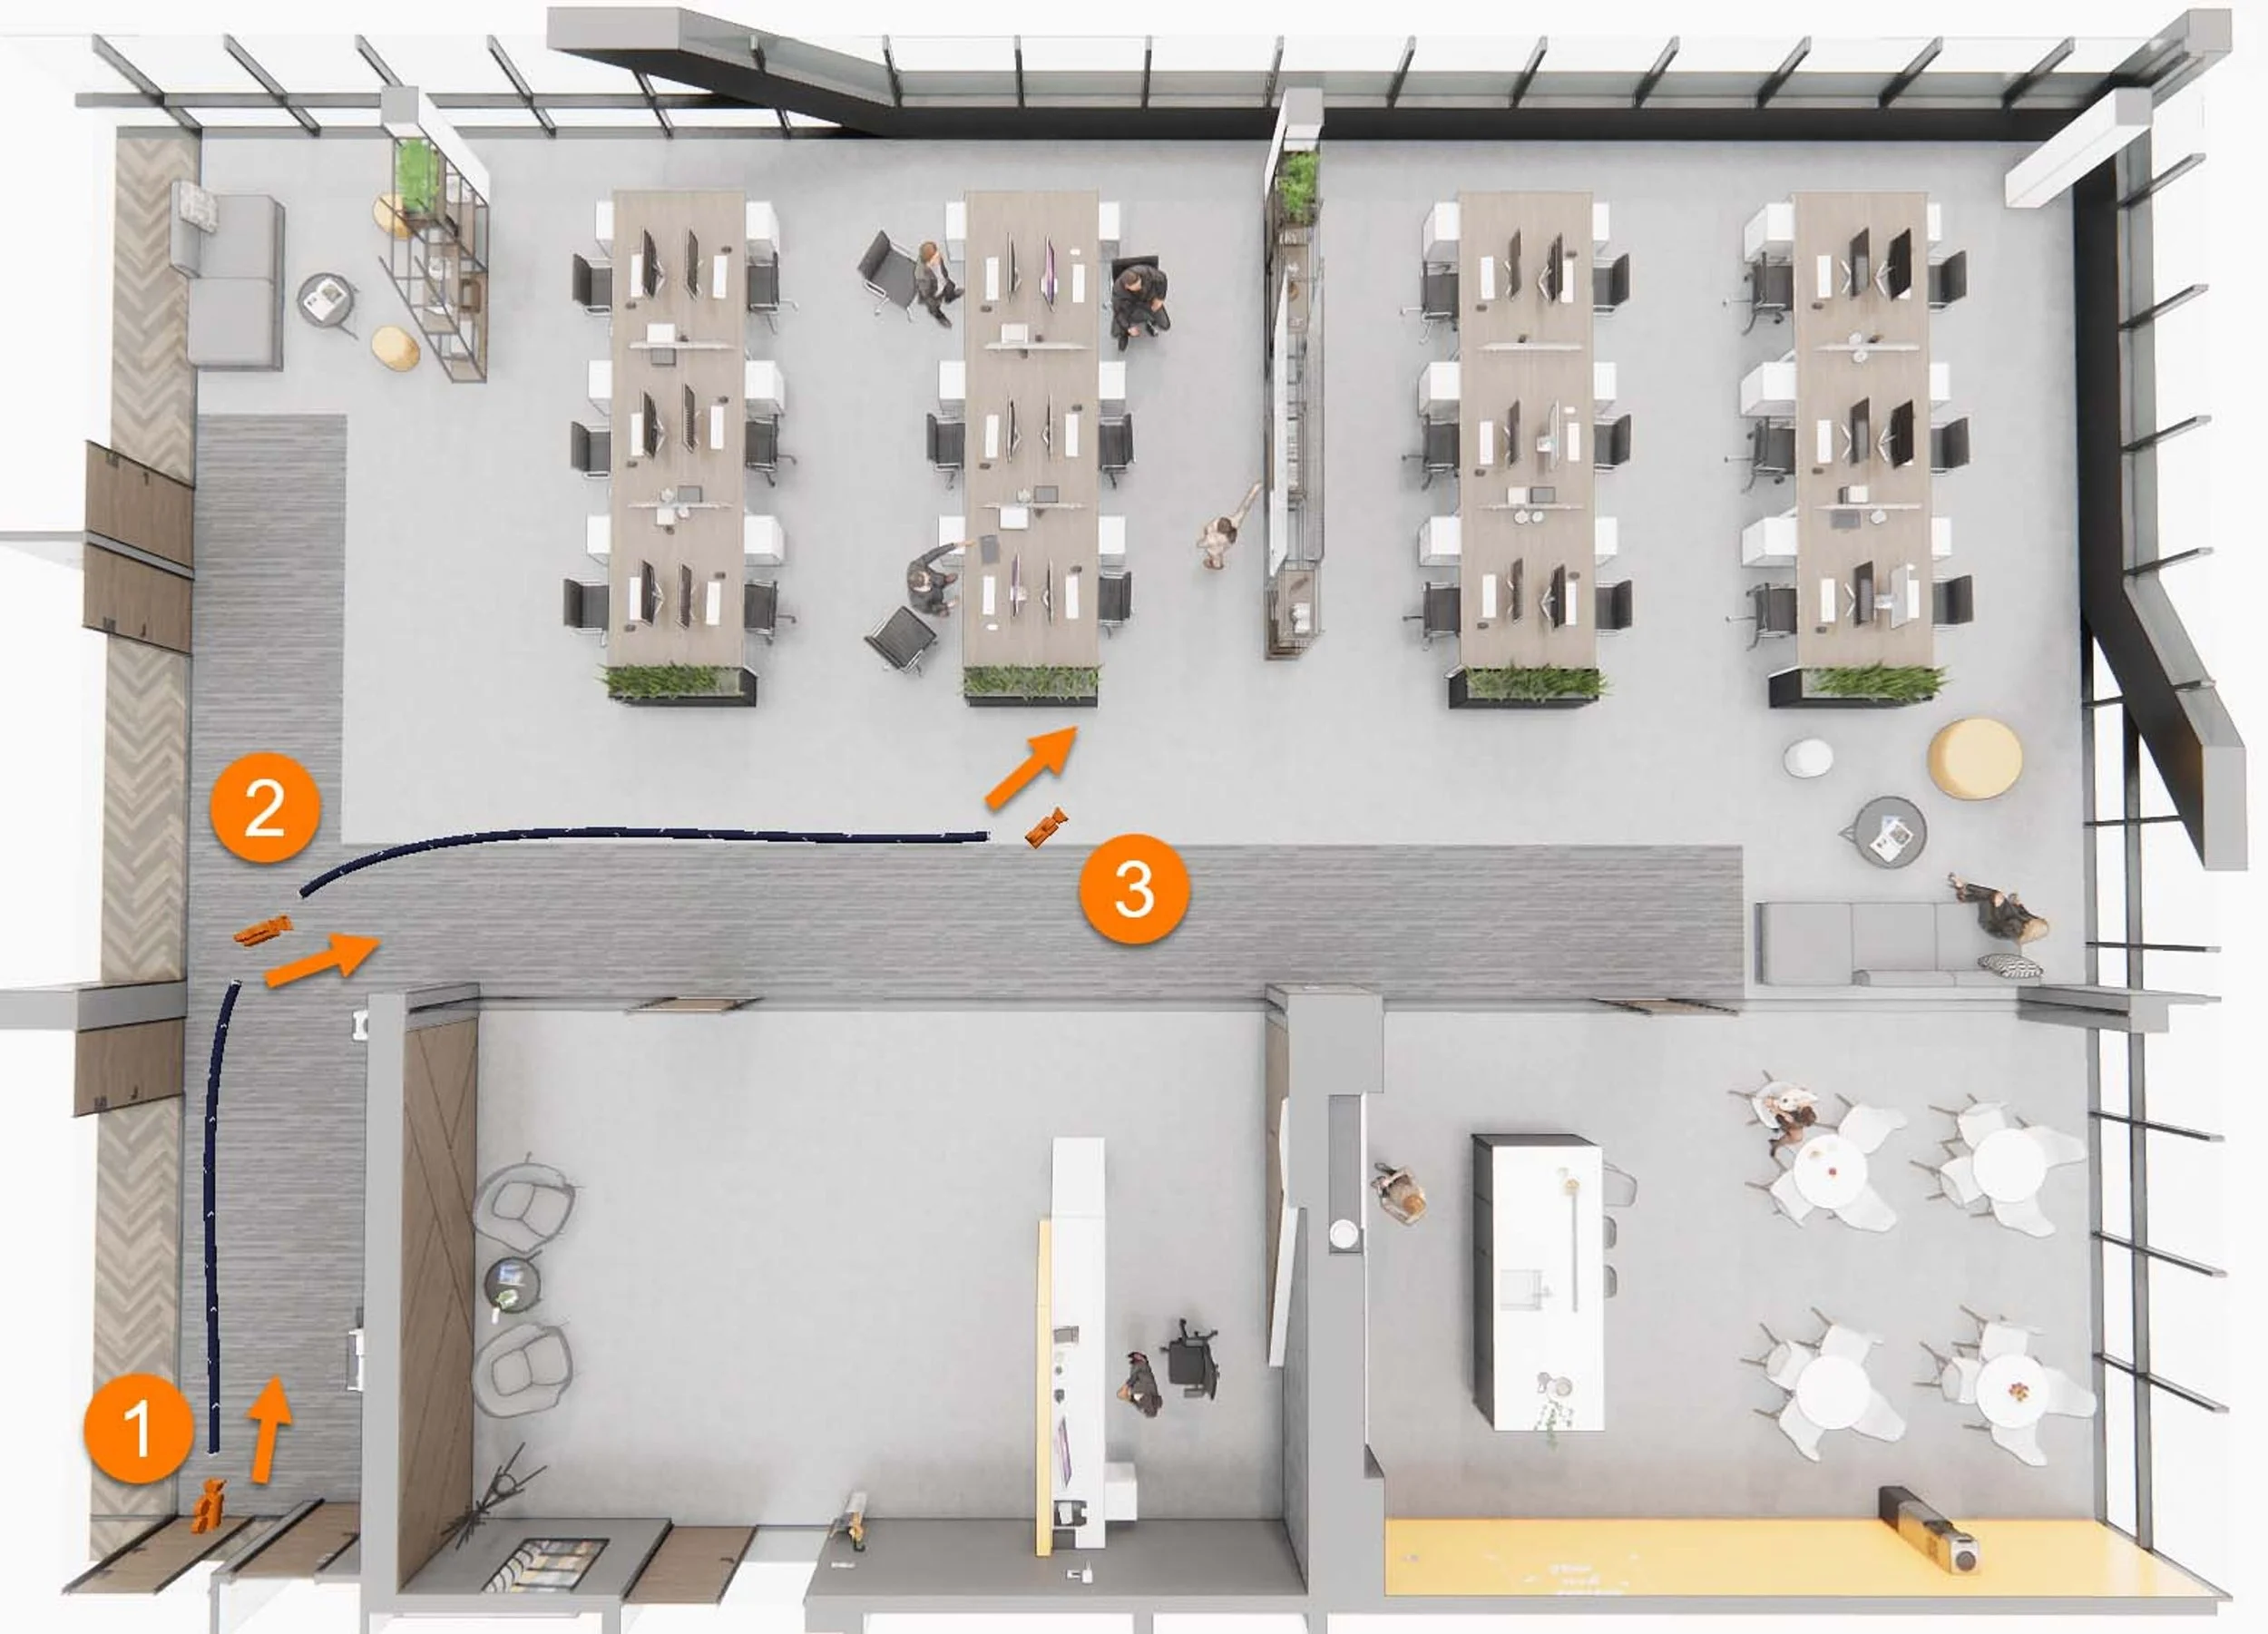
In the video editor, you can select your different keyframes by clicking on the diamond shapes on the timeline. In addition to morphing the view direction, keyframes allow other adjustments such as Time of Day, Focal point, and Field of View. The duration between keyframes can be adjusted by setting an explicit Timestamp.
To finish, once the path is defined, the video may be previewed in Enscape using the Preview command (play button). If everything looks good to you, then use the Export command to make an MP4 file which can be hosted online or generally shared. Keep in mind that you can also adjust the output quality and resolution through the Visual Settings -> Capture tab beforehand.
Creating the video path
A video is created by following a camera path and defining this path has never been easier in the AEC industry when using Enscape. To begin the process, within Enscape, click the Video Editor command (or type V). This will activate the Video Editor UI within Enscape - see image below. Next, while in Enscape, simply compose a view and click the Add Keyframe + button (or type K). This adds a keyframe, represented as a diamond on the Timeline. Continue composing views and adding keyframes along the desired path until it is adequately defined to travel around objects, corners and up and down stairs.
TIP: Be sure to save your path before closing Enscape, otherwise your work will be lost!
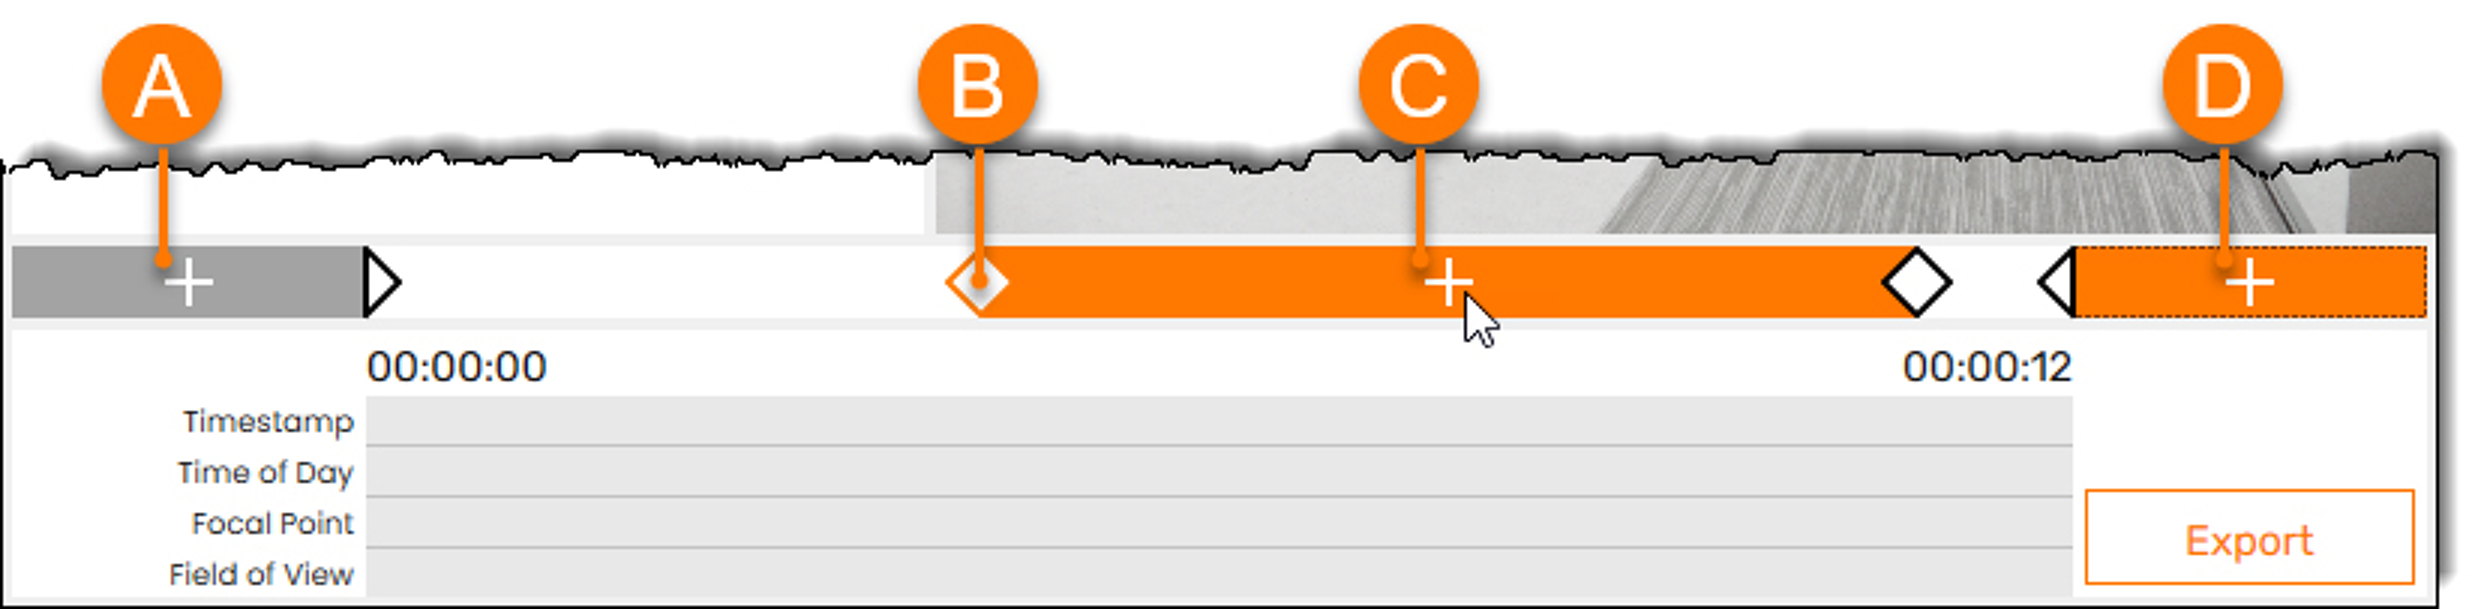
Enscape’s keyframe tools
Keyframe tools legend:
A. Add a new keyframe, based on current Enscape view, before the first keyframe
B. Click a diamond to select a keyframe
C. Click between two keyframes to add a new keyframe
D. Add a new keyframe, based on current Enscape view, after the last keyframe
Editing the video path
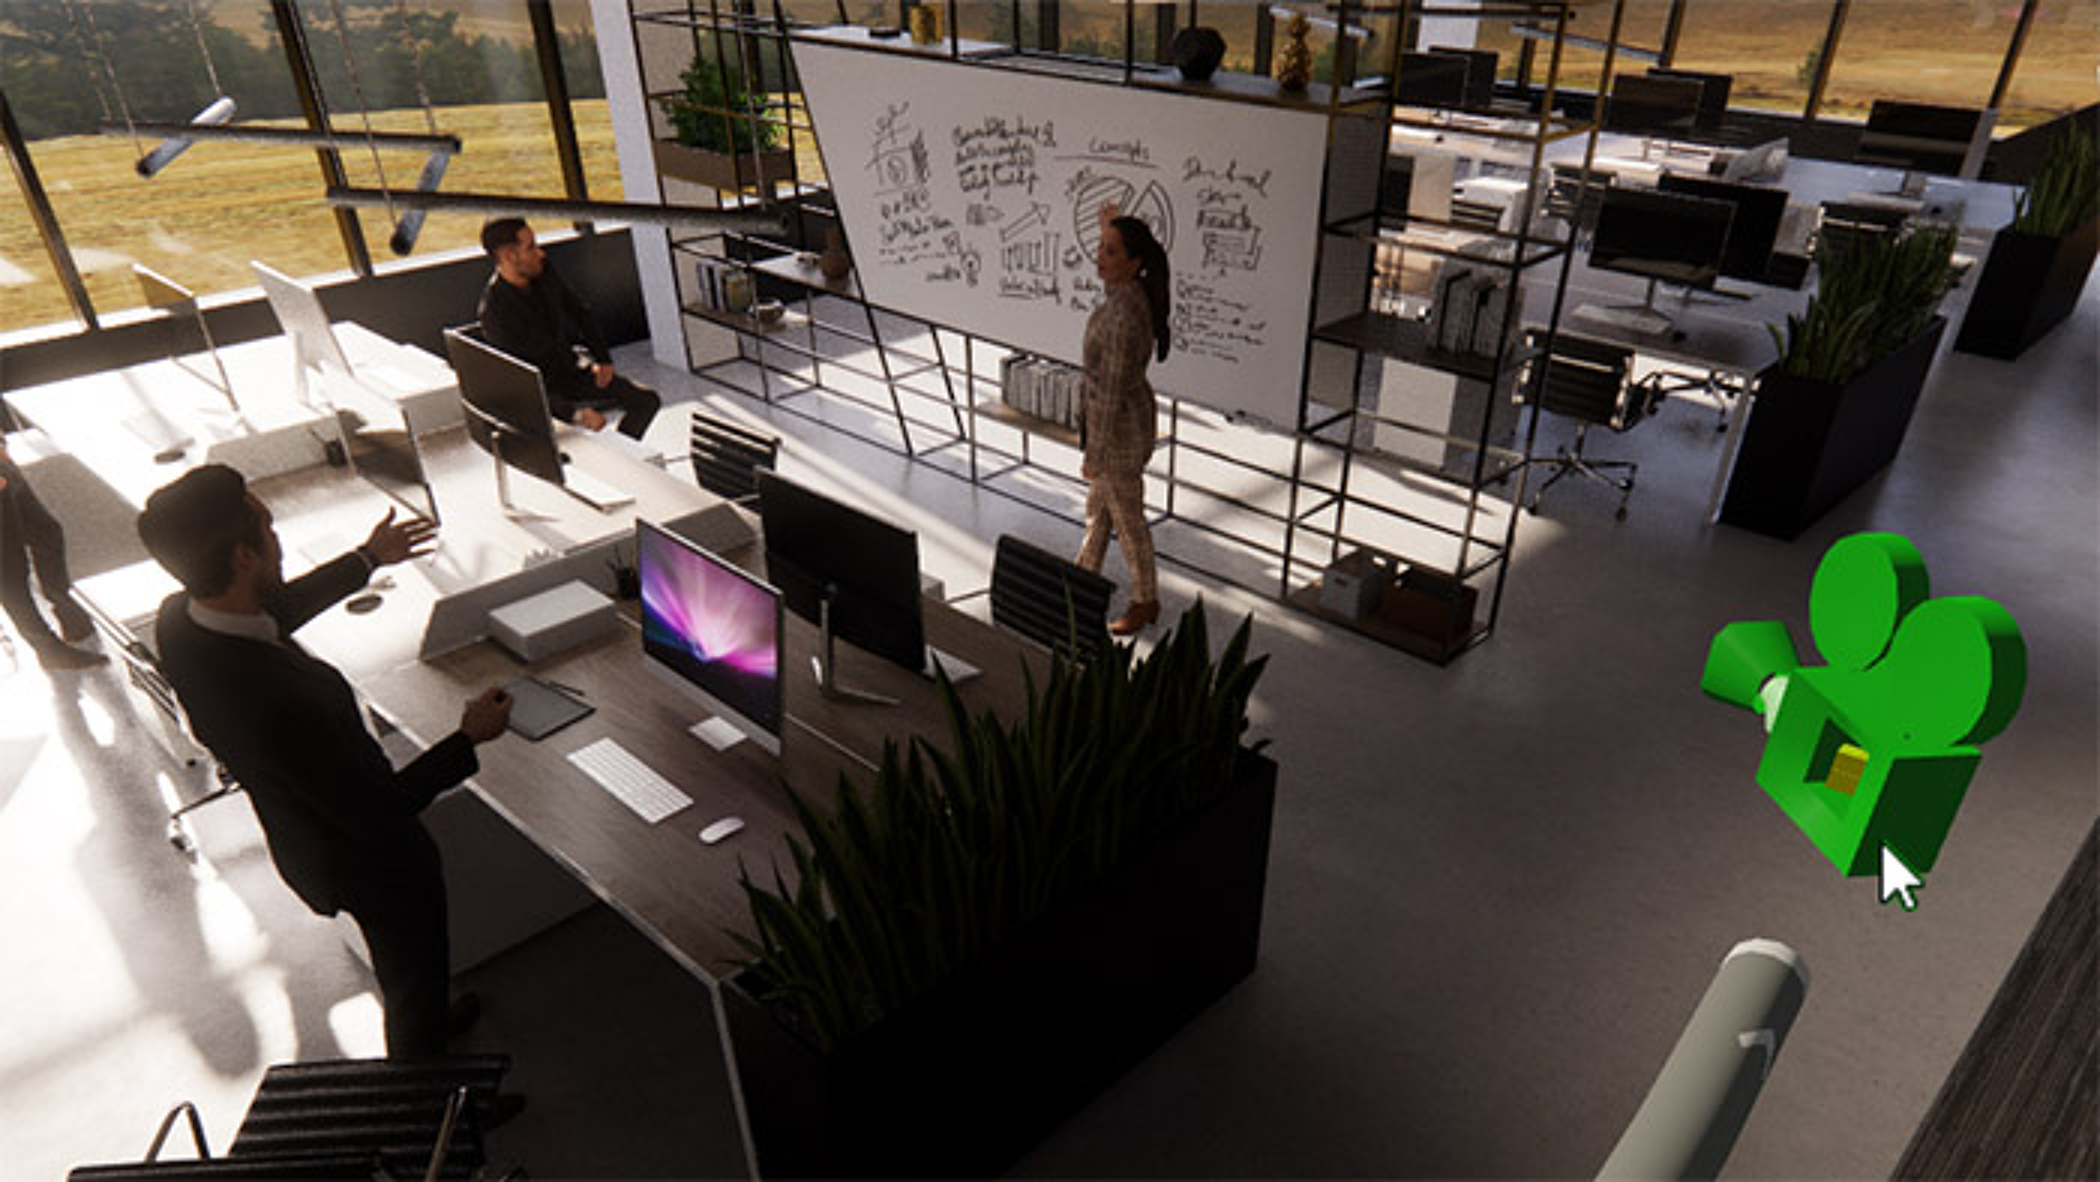
The path may need to be modified to adjust the view direction or avoid colliding with objects in the scene. Enscape makes this easy by allowing us to select keyframes and then visually adjust them. This process can be started within the 3D view or via the Timeline in the Video Editor. In the 3D view, hover your cursor over a camera (i.e. a keyframe) until it turns green (see next image) and then click. Notice how the camera path has arrows on it, indicating the direction of travel.
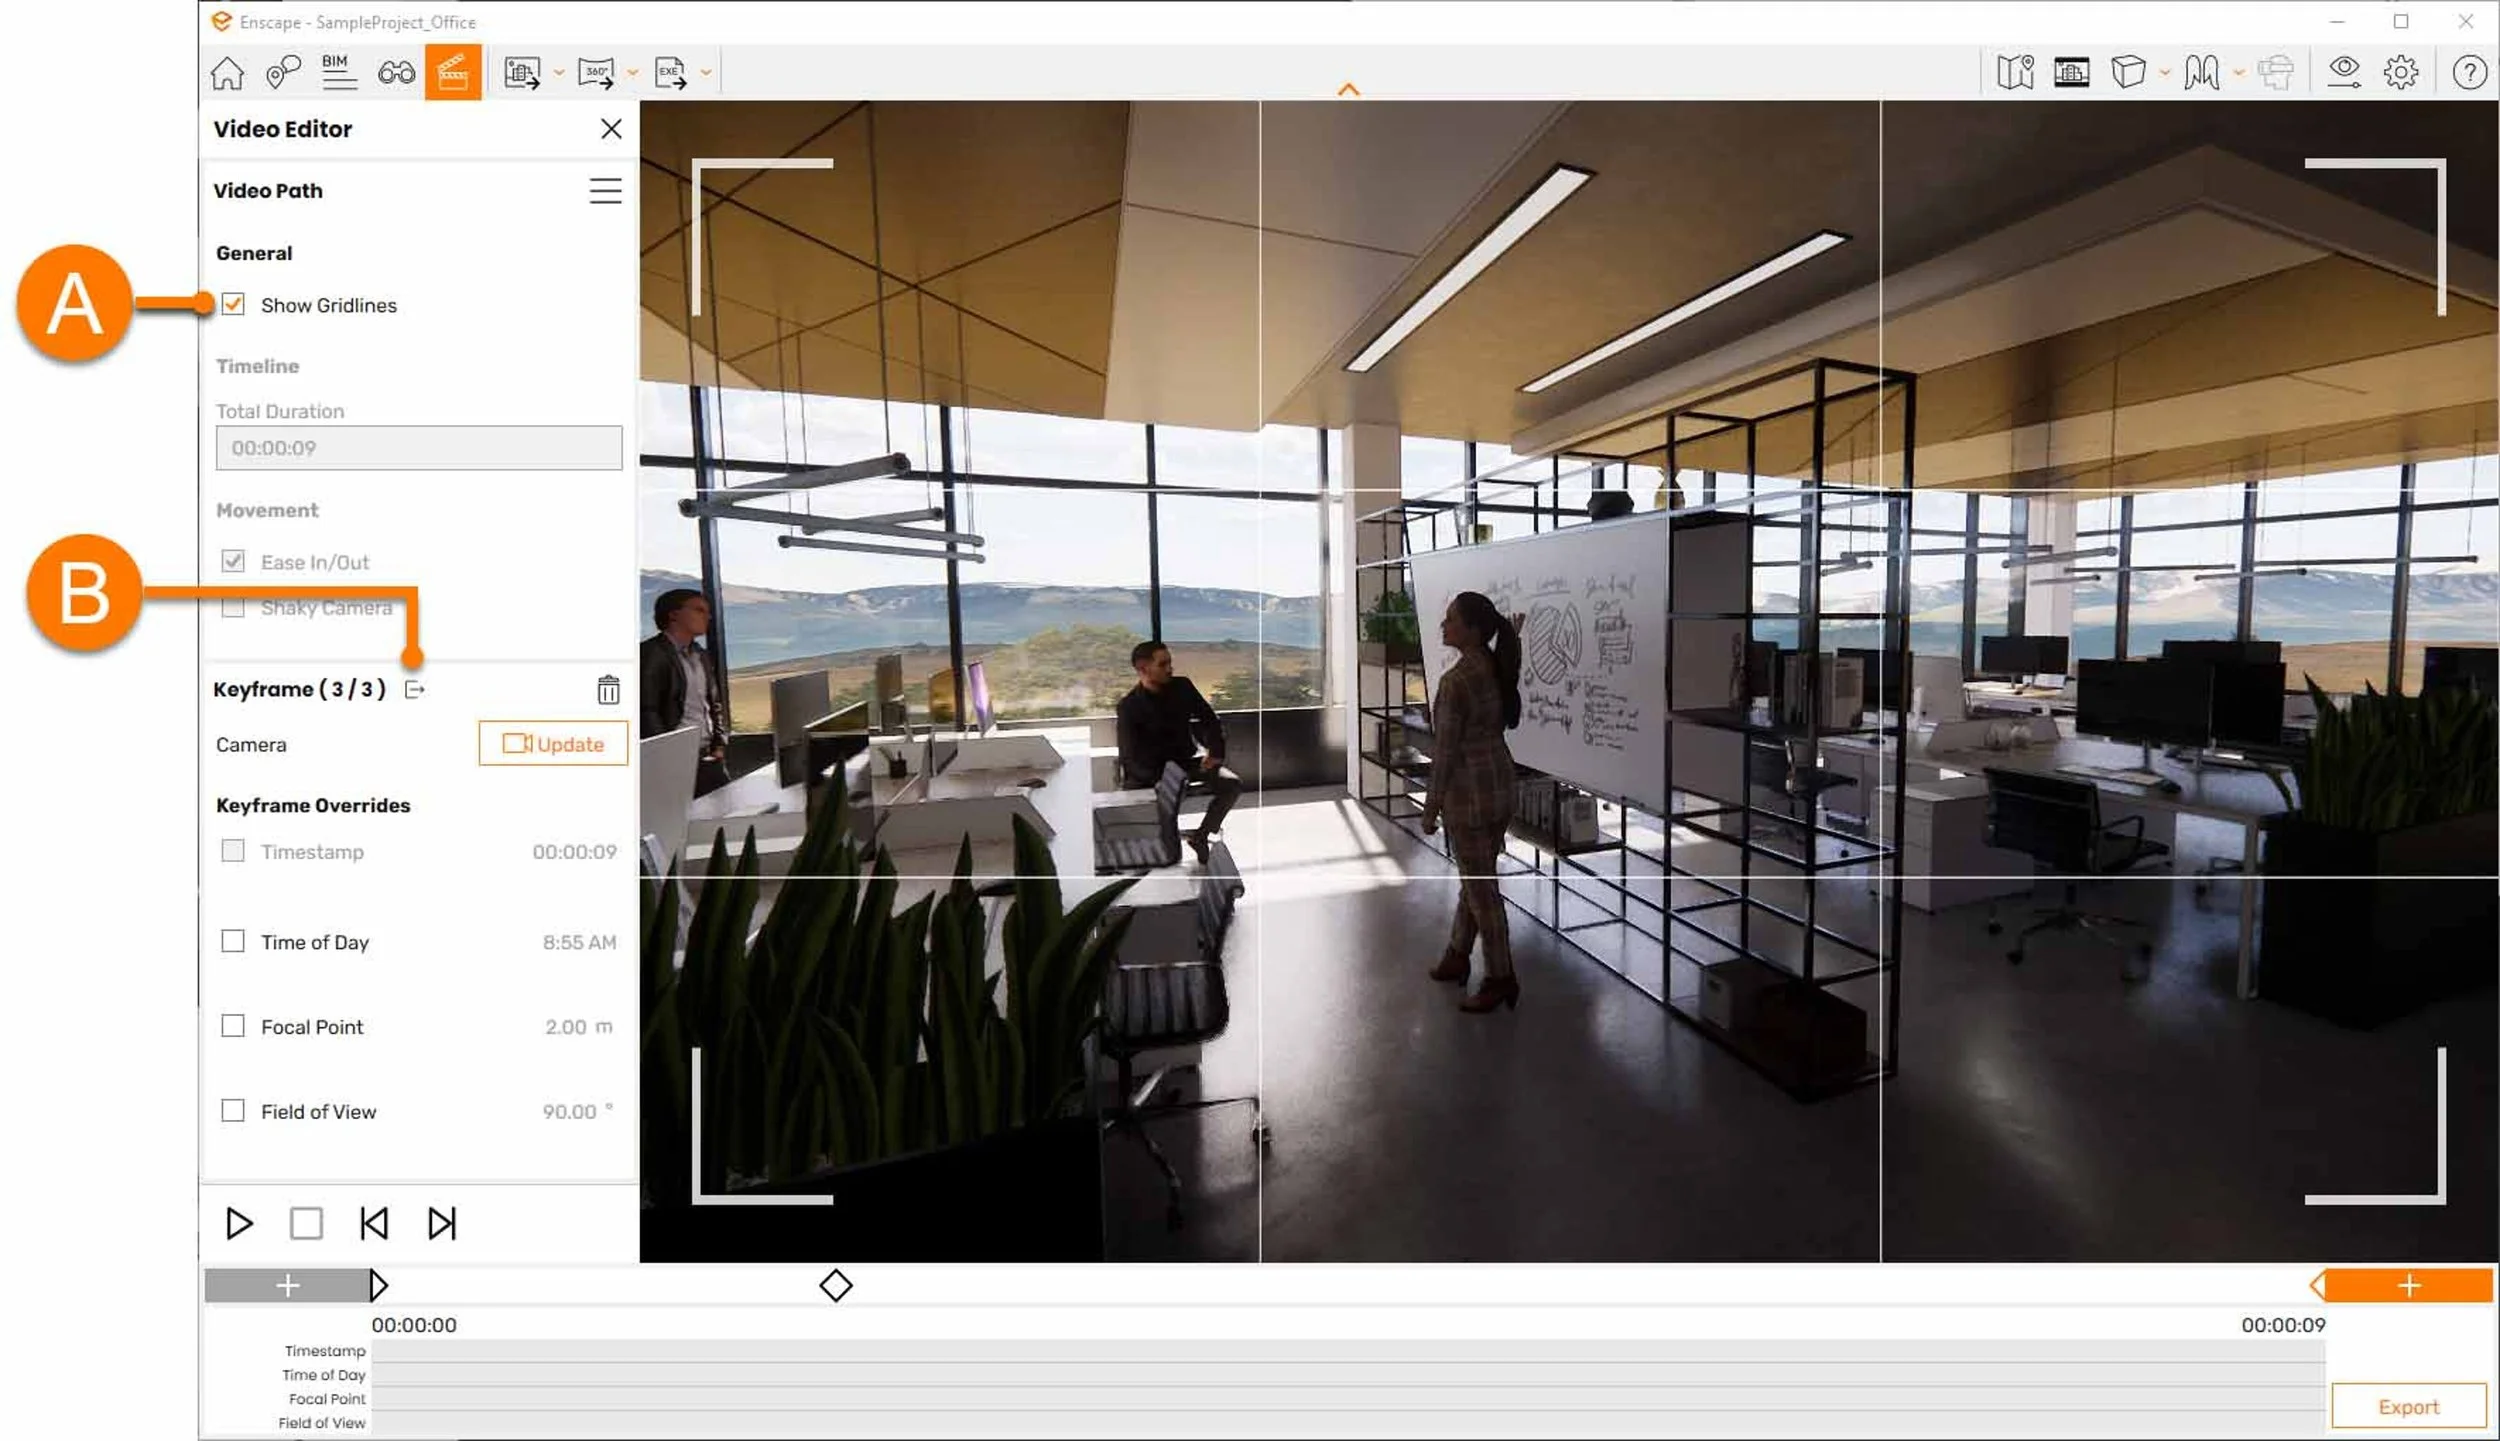
Once a Keyframe is selected, you can toggle Gridline visibility (item A) for reference, as shown in the image below. While in the keyframe, the path is not visible. The path will not appear again until you click Exit Keyframe (item B). Note that the Timeline and Movement options in the Video Editor apply to the entire video, so they are only editable while not in a specific keyframe.
In the short video below, I will show how keyframes can also be inserted graphically on a path just by clicking on it. I demonstrate how to add another keyframe between #2 and #3 so we look straight ahead longer after leaving keyframe #2. I also show how to adjust the camera height, so the video ends with a shot looking down on the kitchen. To do this, simply click on the last keyframe/camera, make the view composition adjustments and then click Update to apply the changes to the current keyframe.
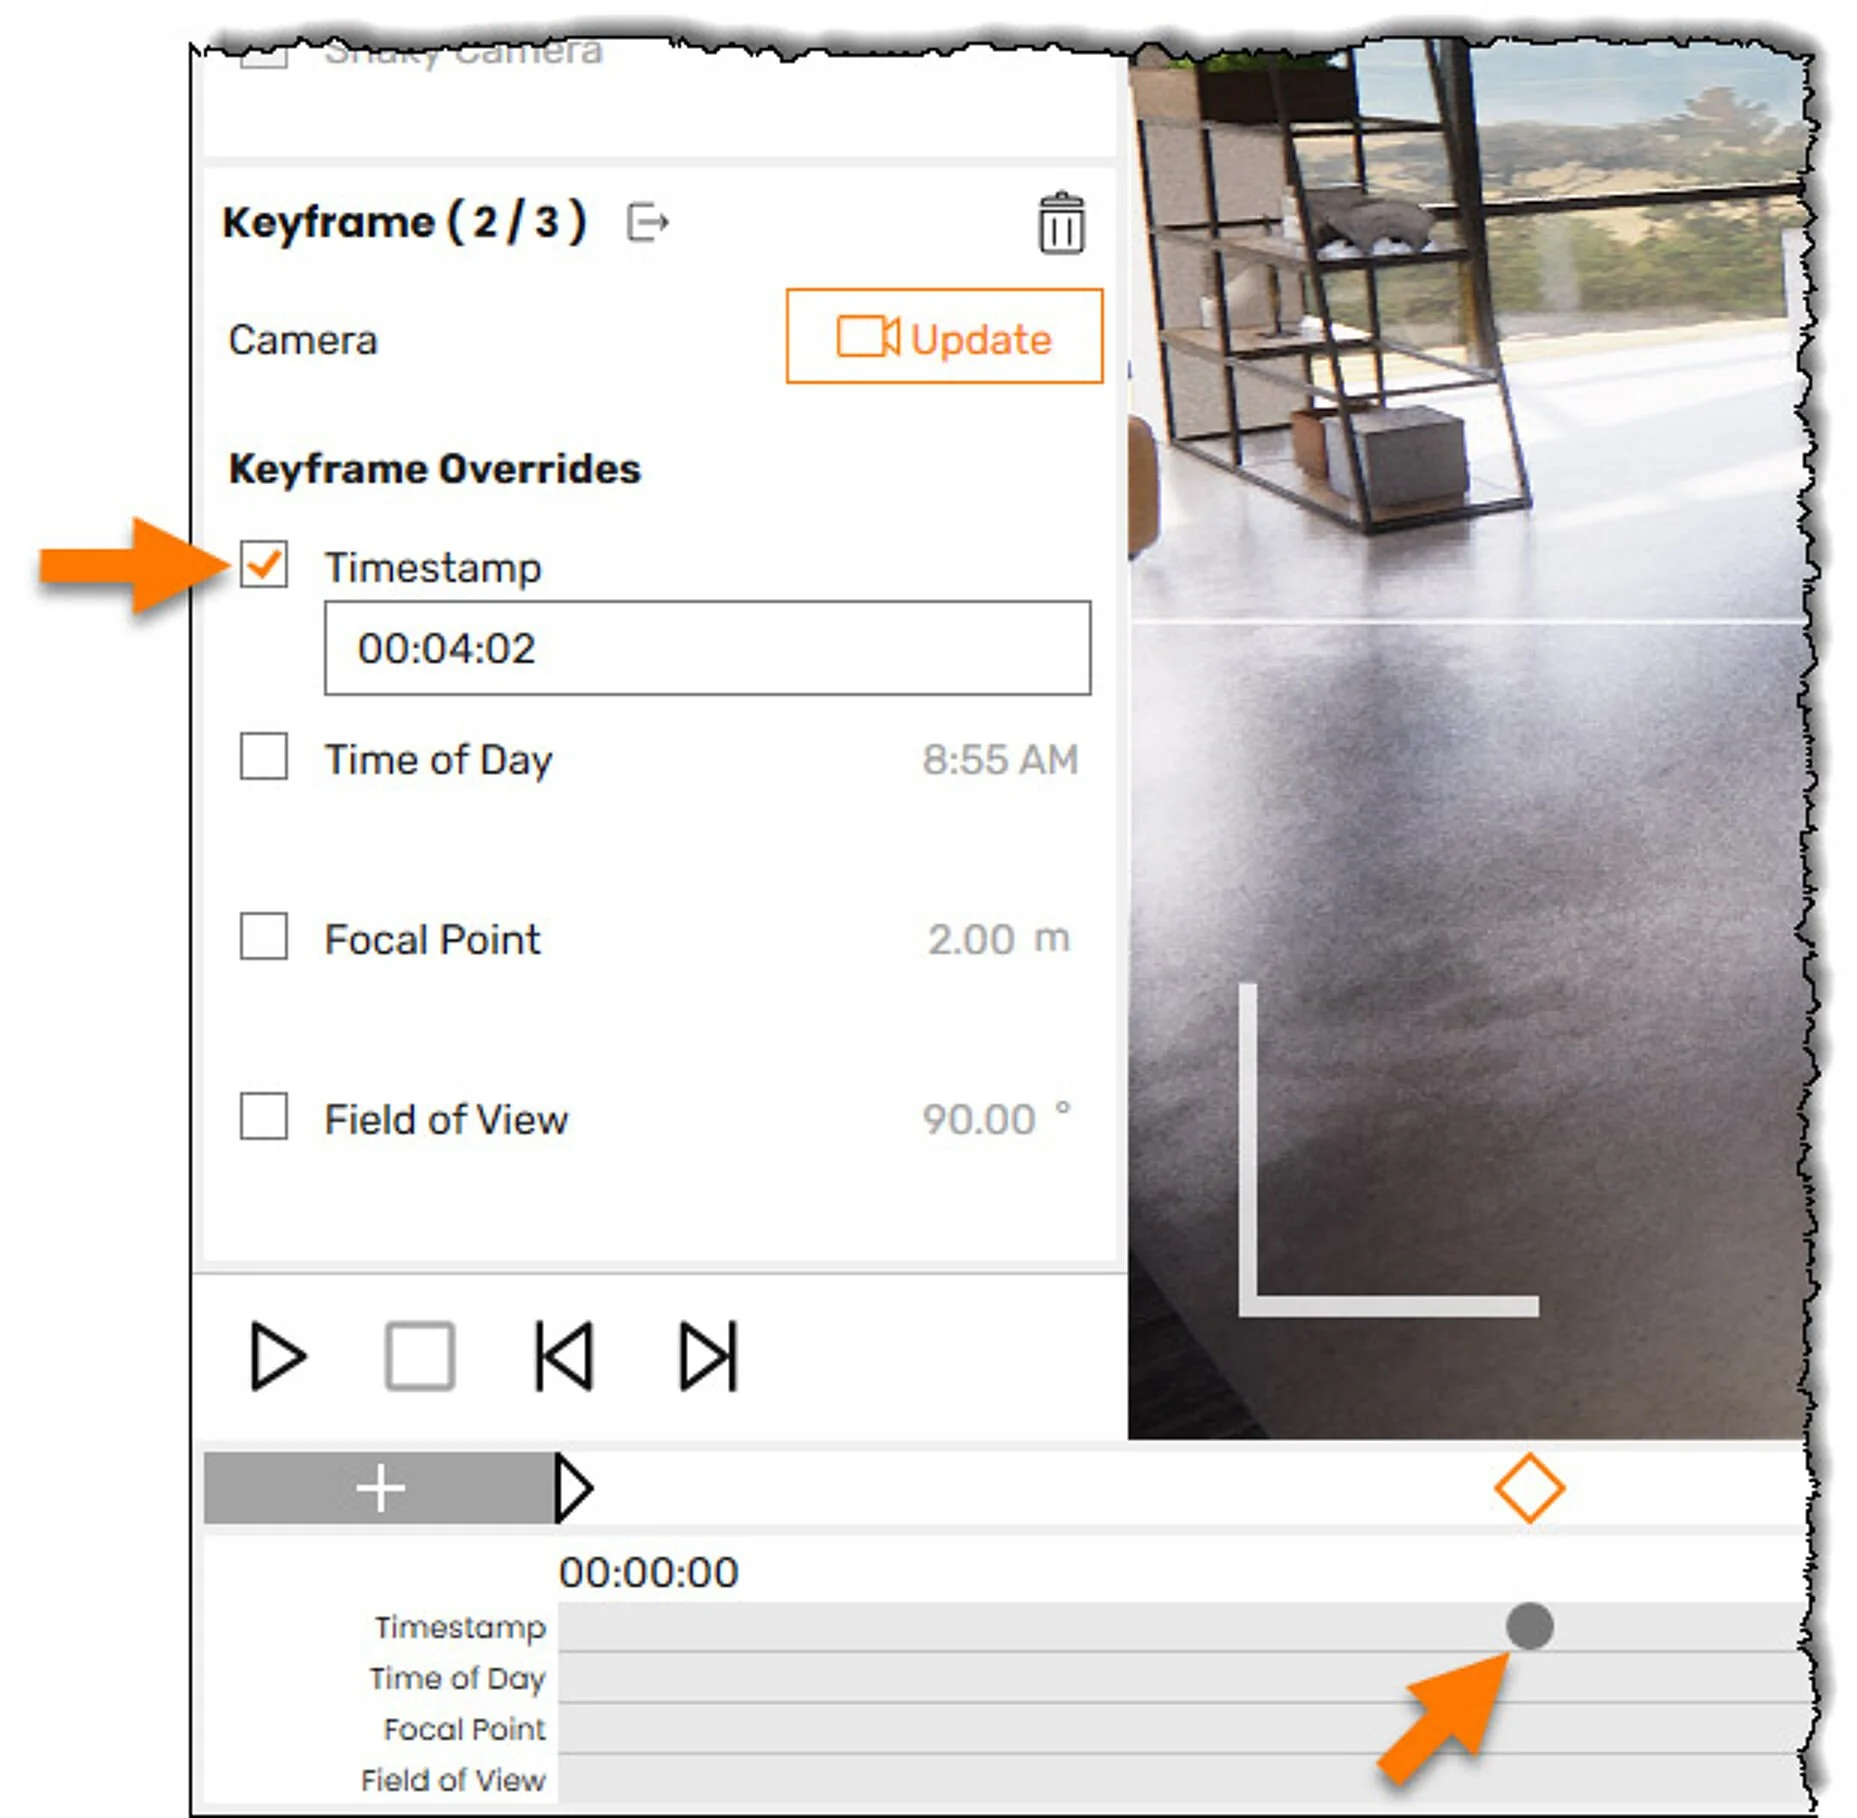
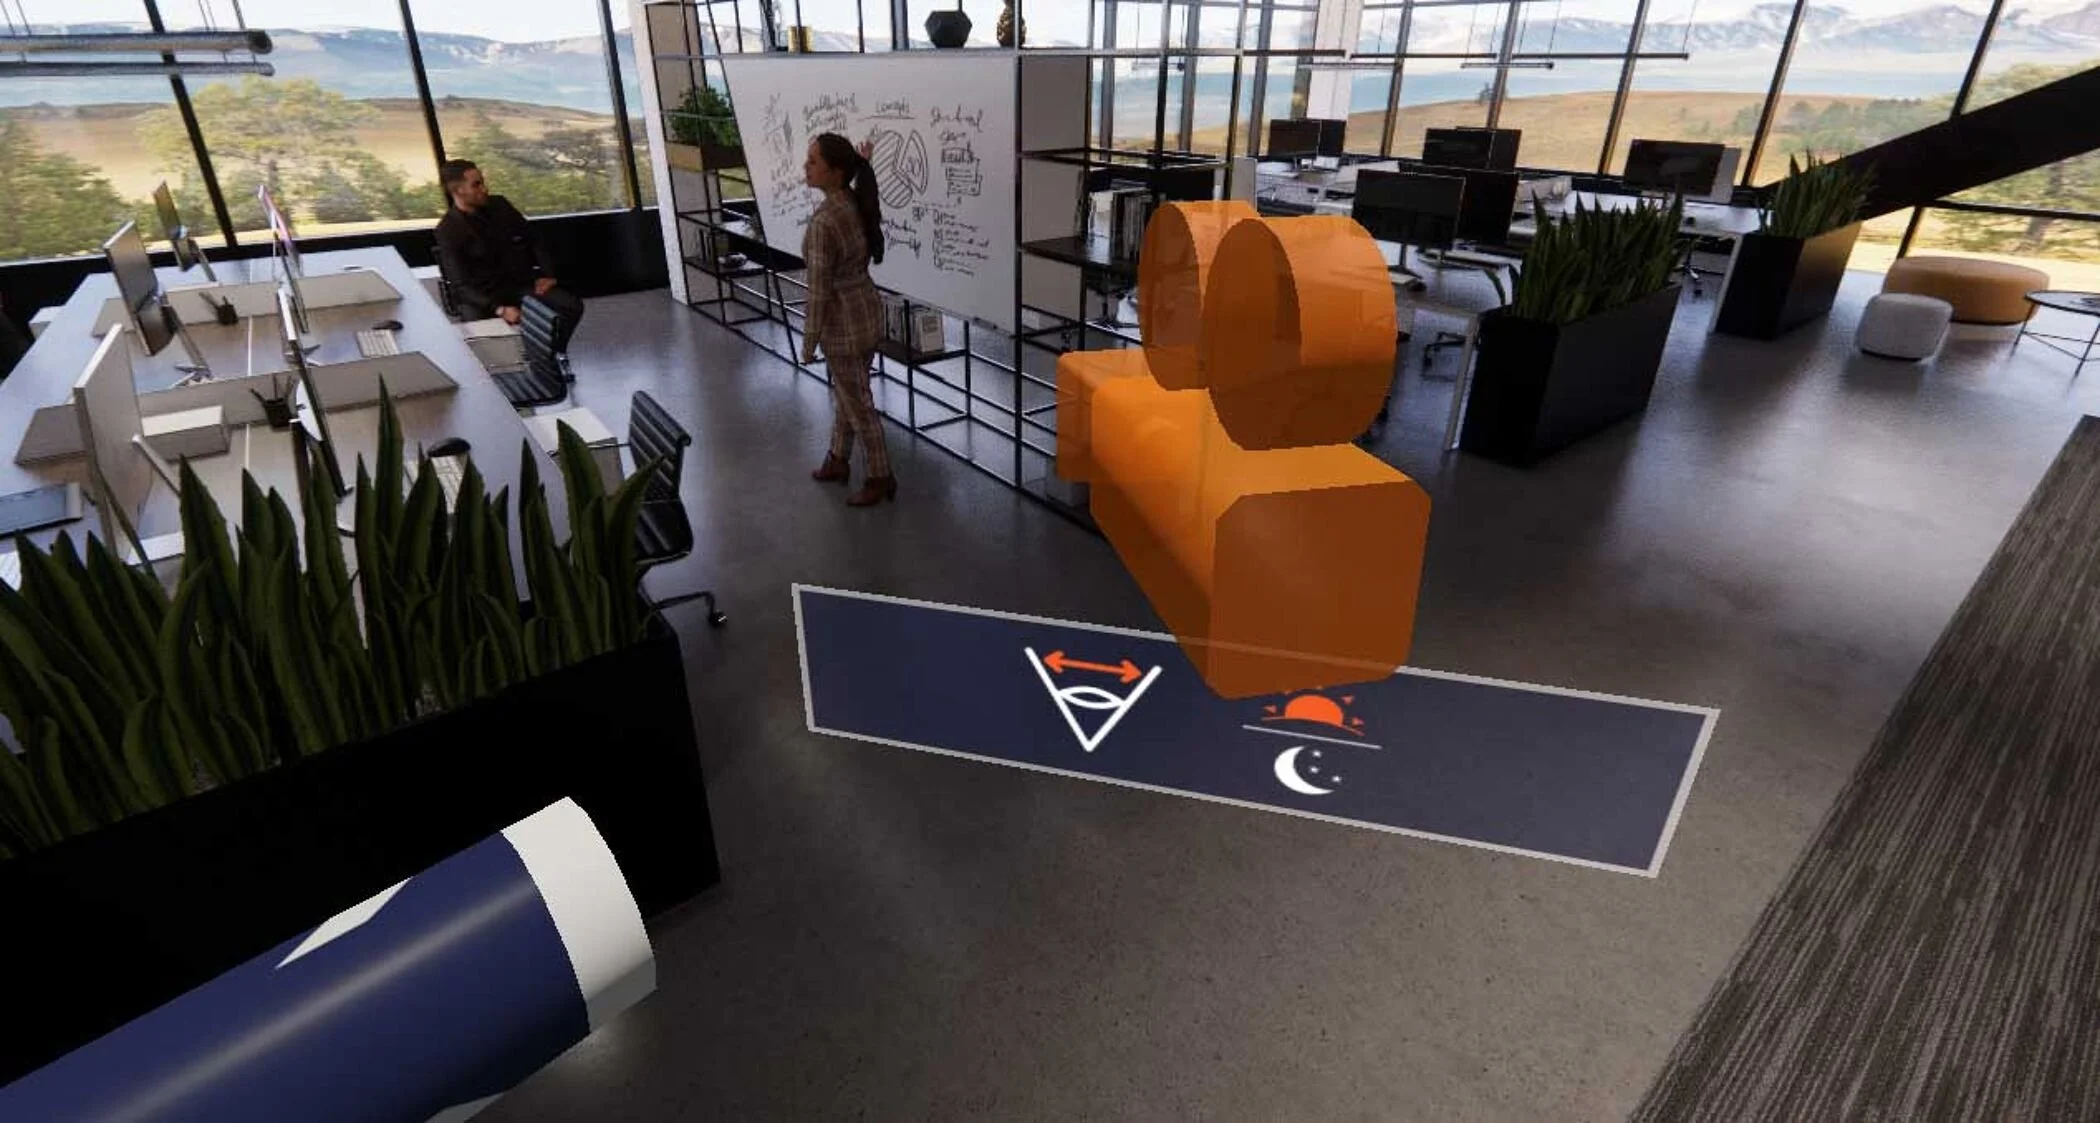
Using the controls in the Keyframe Editor, the Time of Day, Field of View, Depth of Field, and Timestamp can be overridden from the current settings. For example, if a keyframe is selected and the timestamp is adjusted, the duration of the entire video is adjusted. Or, if the time of day is adjusted in at least two keyframes, it will morph between these views. To help keep track of where overrides exist, markers are added to the Timeline as shown in the following image. These same adjustments can be seen in Enscape, next to each keyframe as shown in the second image below. It is important to remember to click Update to save changes to the current keyframe.